Import documents from ZIP
Importing documents from a ZIP compressed folder is available under the "+ Add" button in the left side menu of the desktop application. Select “Import ZIP from Excel” from the drop-down list.

Prepare and upload a compressed folder
Bulk import allows you to send multiple documents compressed in ZIP format. The application allows two import options:
– based on an Excel file containing a list of documents with information about the employee and (optionally) the document type and its target name,
– simple import of all documents contained in a compressed folder with manual setting of data for individual files.
An example import structure with an Excel file and a file to download can be found under the link "szablon".
The xlsx file should contain data columns:
- Technical name of the file with extension
- Employee ID (PESEL, ID in the eFOB system, external ID or ID document number)
- The target name of the file with the extension that is to be visible to the employee (optional)
- Type of imported document (optional)

Documents and the prepared Excel file (in the case of import based on a file) must be packed in the ZIP format. Before loading the created ZIP file, select/uncheck the options available in the work area:
- Skip headers – select this option if the first line in the xlsx file is a column header with a description
If the structure of the ZIP file is incorrect, the system will display an information message when loading the file.
After uploading the file, the system will check if there is an Excel file in the folder. If so, the column mapping screen will be shown. Otherwise, the user will be redirected to the adding documents screen, which will display all files read from the folder.
Column mapping
After uploading a folder containing an Excel file, the user can assign columns from the file to individual data fields for import. It is required to select a column indicating the employee ID and the input name of the document (i.e. the name of the file located in the ZIP folder). Additionally, you can indicate a column containing the text name of the document type and the target name that will be assigned to the document when imported to the system.
Above the mapping table are the remaining possible settings:
– Unique employee identifier – indicates the type of identifier contained in the Excel file, based on which the system will search for the employee to whom the document is to be assigned. Possible options are: ID, PESEL, External ID and ID document number.
– Excel file tab – in the case of a file containing more than one sheet, indicate from which the data is to be downloaded
– Skip headers – allows you to change the option selected before uploading the file

If the user does not want to download document data from an Excel file, but only uploads all documents from the folder to the system (including Excel files), he can select the "Skip Excel" option. After confirming the action, you will be redirected to the screen for adding multiple documents.
If you have selected mapping columns, select the “Continue” button. Data downloaded from Excel will be sent for verification.
Data verification results
After verification, the system will display the results of file processing along with comments.
There are three possible file processing statuses: OK, warning, error. Before the final addition of documents, you can delete incorrect data based on the displayed comments or return to the previous screen ("Cancel" button).
The displayed data can be filtered by the selected employee and processing status.

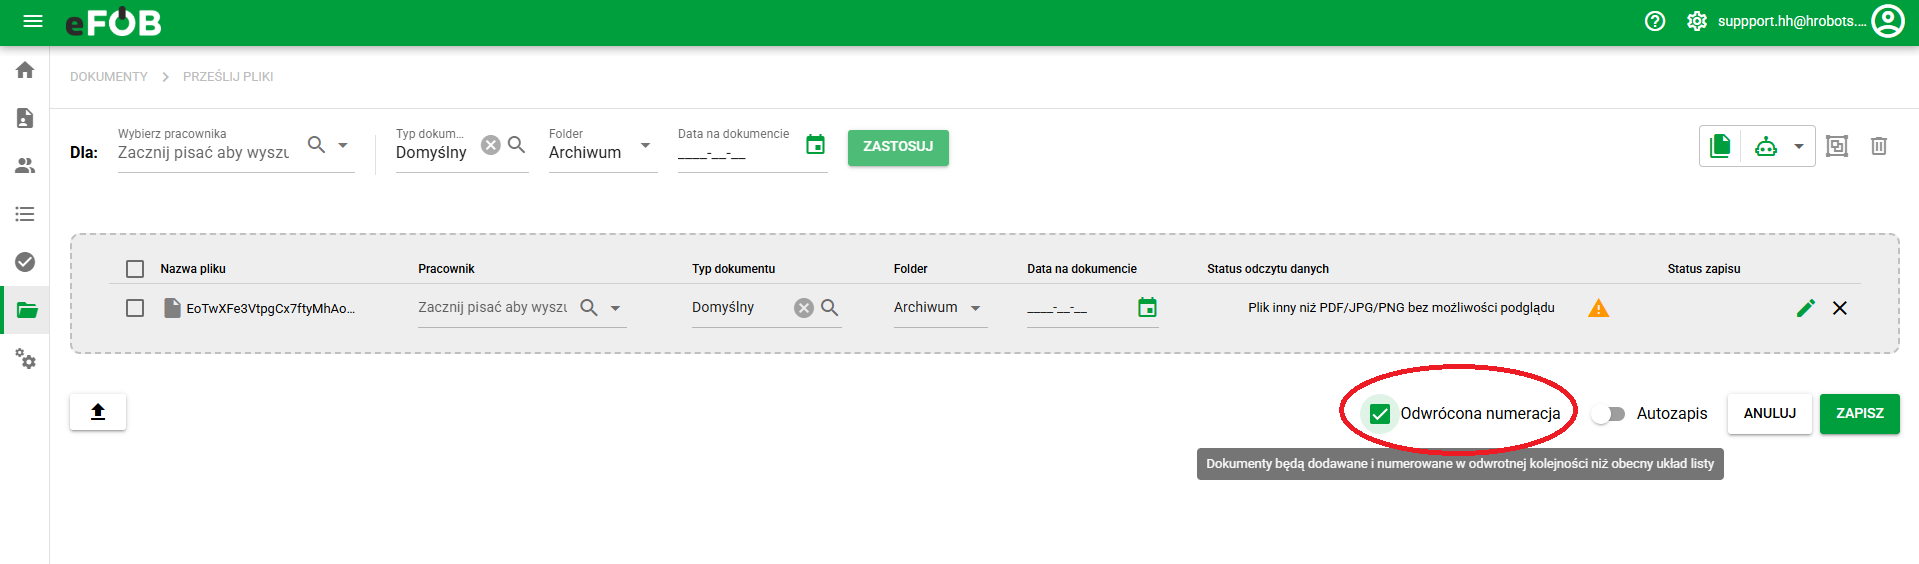
Reverse numbering
The "Numbering reversal" option is a function available in the document digitization system, the purpose of which is to automatically reverse the numbering order of files/documents during their processing. When files are uploaded in bulk using the "Upload Files" option, the system may assign them a default order based on the time they were added, with the newest file appearing first.
For digitization processes, this order is undesirable - in many cases, documents must be arranged and numbered from the oldest to the newest, just as they were physically scanned.
When the function is activated:
-
The system reverses the file numbering order.
-
The first scanned (i.e. oldest) file receives the number 1.
-
The last file scanned receives the highest number (e.g. 30 of 30).
-
File names or metadata are automatically adjusted according to this order.